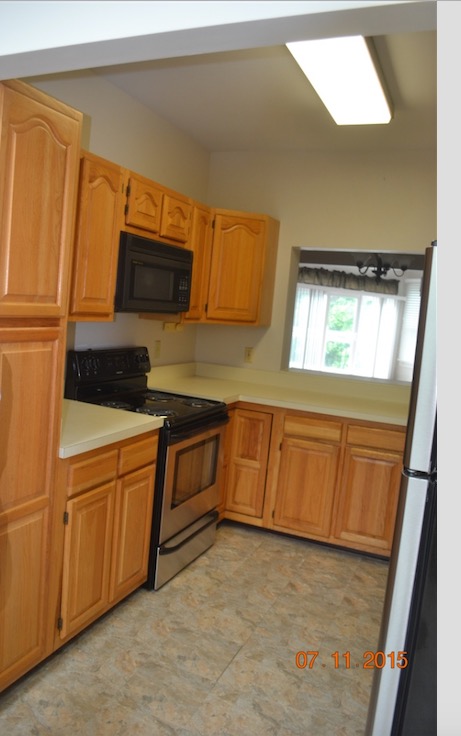
I'm so excited about my new kitchen....actually my old kitchen with a new face!! The before shows a normal kitchen with builder's grade kitchen cabinets, formica countertops and dull walls! For a condo, the kitchen has an amazing amount of storage and suits me to a tee. The breakfast room has two wonderful skylights allowing the room to be bright and sunny all day.

First I labeled all the cabinet doors using a raffle system, # on the door and matching # inside the cabinet so that they would all go back home where they belong!
The first process was to paint the 'boxes' that held everything. I used Zinsser Bull's Eye, all purpose primer and 3 coats of Valspar Voyage. I allowed 24 hours dry time with each coat and finished it with Minwax Polycrylic Protective Finish. No judgement on the messy contents....actually it was a great opportunity to clean everything out and wash the interior of the 'boxes'.


I set up a painting station in the breakfast room, covering the flooring with brown paper.


I cleaned all the cabinet doors and drawers with Krud Kutter. This is a great solution for cleaning all dirt and oil from the wood. Next I lightly sanded and repaired any cracks with wood filler and cleaned them a second time. I primed the doors and drawers with one coat of the Zinsser Bull's Eye. I did not fully sand after the primer, just where the cracks had been filled and any irregularities. I painted the doors and drawers with the same Valspar color and finished with Polycrylic. Allowing them 24 hour drying time was painful and it really made the job take a long time!
Next on the agenda was to paint the walls in the kitchen and the breakfast room. All Valspar paint chips come with 3 harmonizing colors. I used Valspar Voyager for the cabinets, Valspar Silver Leaf for the kitchen walls and Drizzling Mist for the breakfast room. I like the contrast and yet the same family of colors.
The old formica countertop was so stained and ugly! I priced getting a new one and it was way out of my budget, so I found this nifty little kit online called Giani Granite. It is paint and a technique to make the countertops look like faux granite. The first step is to paint them black......using a large sponge, the next step was to sponge on a slate gray color. Step 3 was to sponge on gold. At this point, I was really skeptical because I thought it was hideous. Step 4 was to sponge on white, then use a clean sponge to blend all the colors until you like the effect. The last step is to paint the finished countertops with an acrylic to protect the faux granite.

Step 1, paint black

Step 2, sponge on slate gray

Step 3, sponge on gold

Step 4, sponge on white,
then use dry sponge to mix the colors,
top with an acrylic sealant
Can you believe it! It doesn't even look like the same countertop! I love it and am so glad I did it. It looks kind of like a Monet....pretty from a distance, but kind of messy up close!
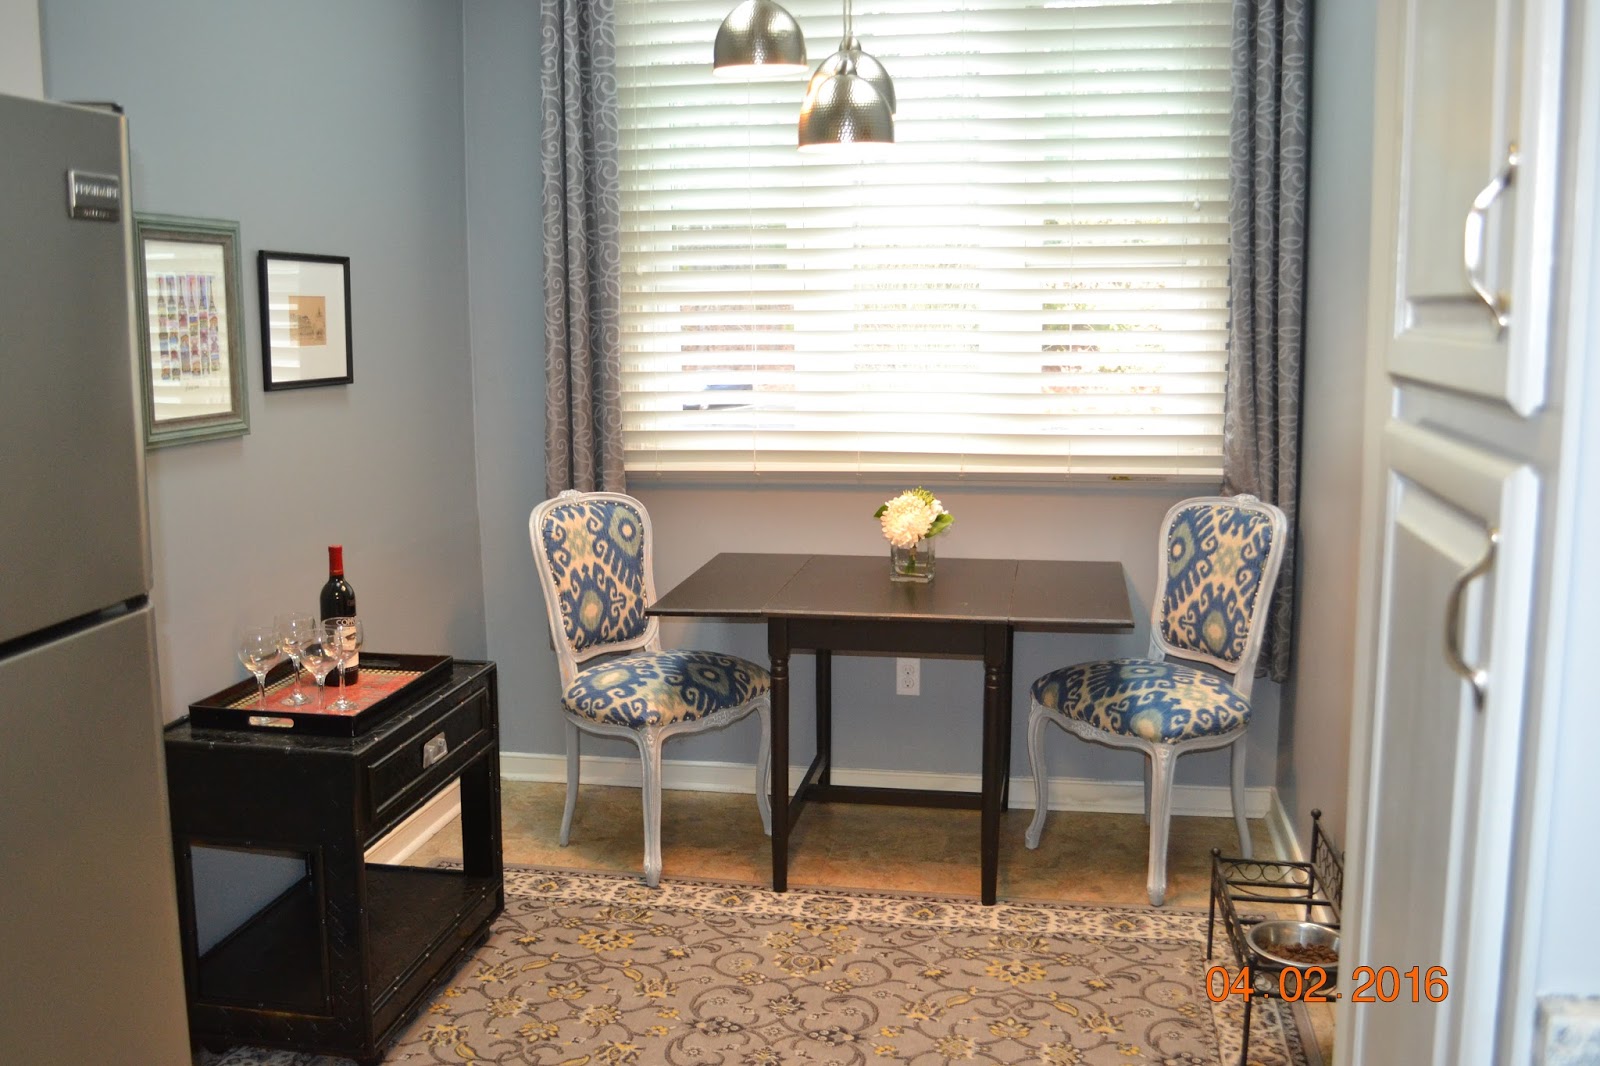
My daughter, Lauren, gave me some Louis style side chairs for me to use in my breakfast room. They were purchased at a thrift store for $ and she had not gotten around to redoing them, so she gave them to me!! I love the style and had fun deciding how to use them.


I painted them gray using the breakfast room wall color and then whitewashed them with primer and wiped the white off leaving some in the nooks and crannies of the Louis design. I love the way they look!
I found some dented metal light covers at Lowe's to change out the flying saucers!
I bought a 3x5 rug from At Home for the kitchen and a 5x7 for the breakfast room to soften each a little. My son-in-law, Marcelo and his brother Luis (who was visiting from Chile) changed out all my electrical sockets from dirty off-white to nice new white ones. It made the kitchen look so much nicer. Luis also installed an ice-maker in my fridge, which is heaven....no more ice trays!! (I inherited a brand new refrigerator with no frills)
I already had a gate leg table from IKEA and I added some plain curtains from At Home over the blinds. The wicker cart was part of a set of furniture that Lauren gave me and I painted it black to match the table. The pictures are some I took while I was in Paris and framed them for my Condo. I still have a blank wall, but I am waiting for inspiration to decorate it! Here is the finished kitchen suite!!!